No-Bake Key Lime Cheesecake Bars
- Gluten-Free
- Dairy-Free
- Paleo
- Vegetarian or Vegan
- Pescatarian
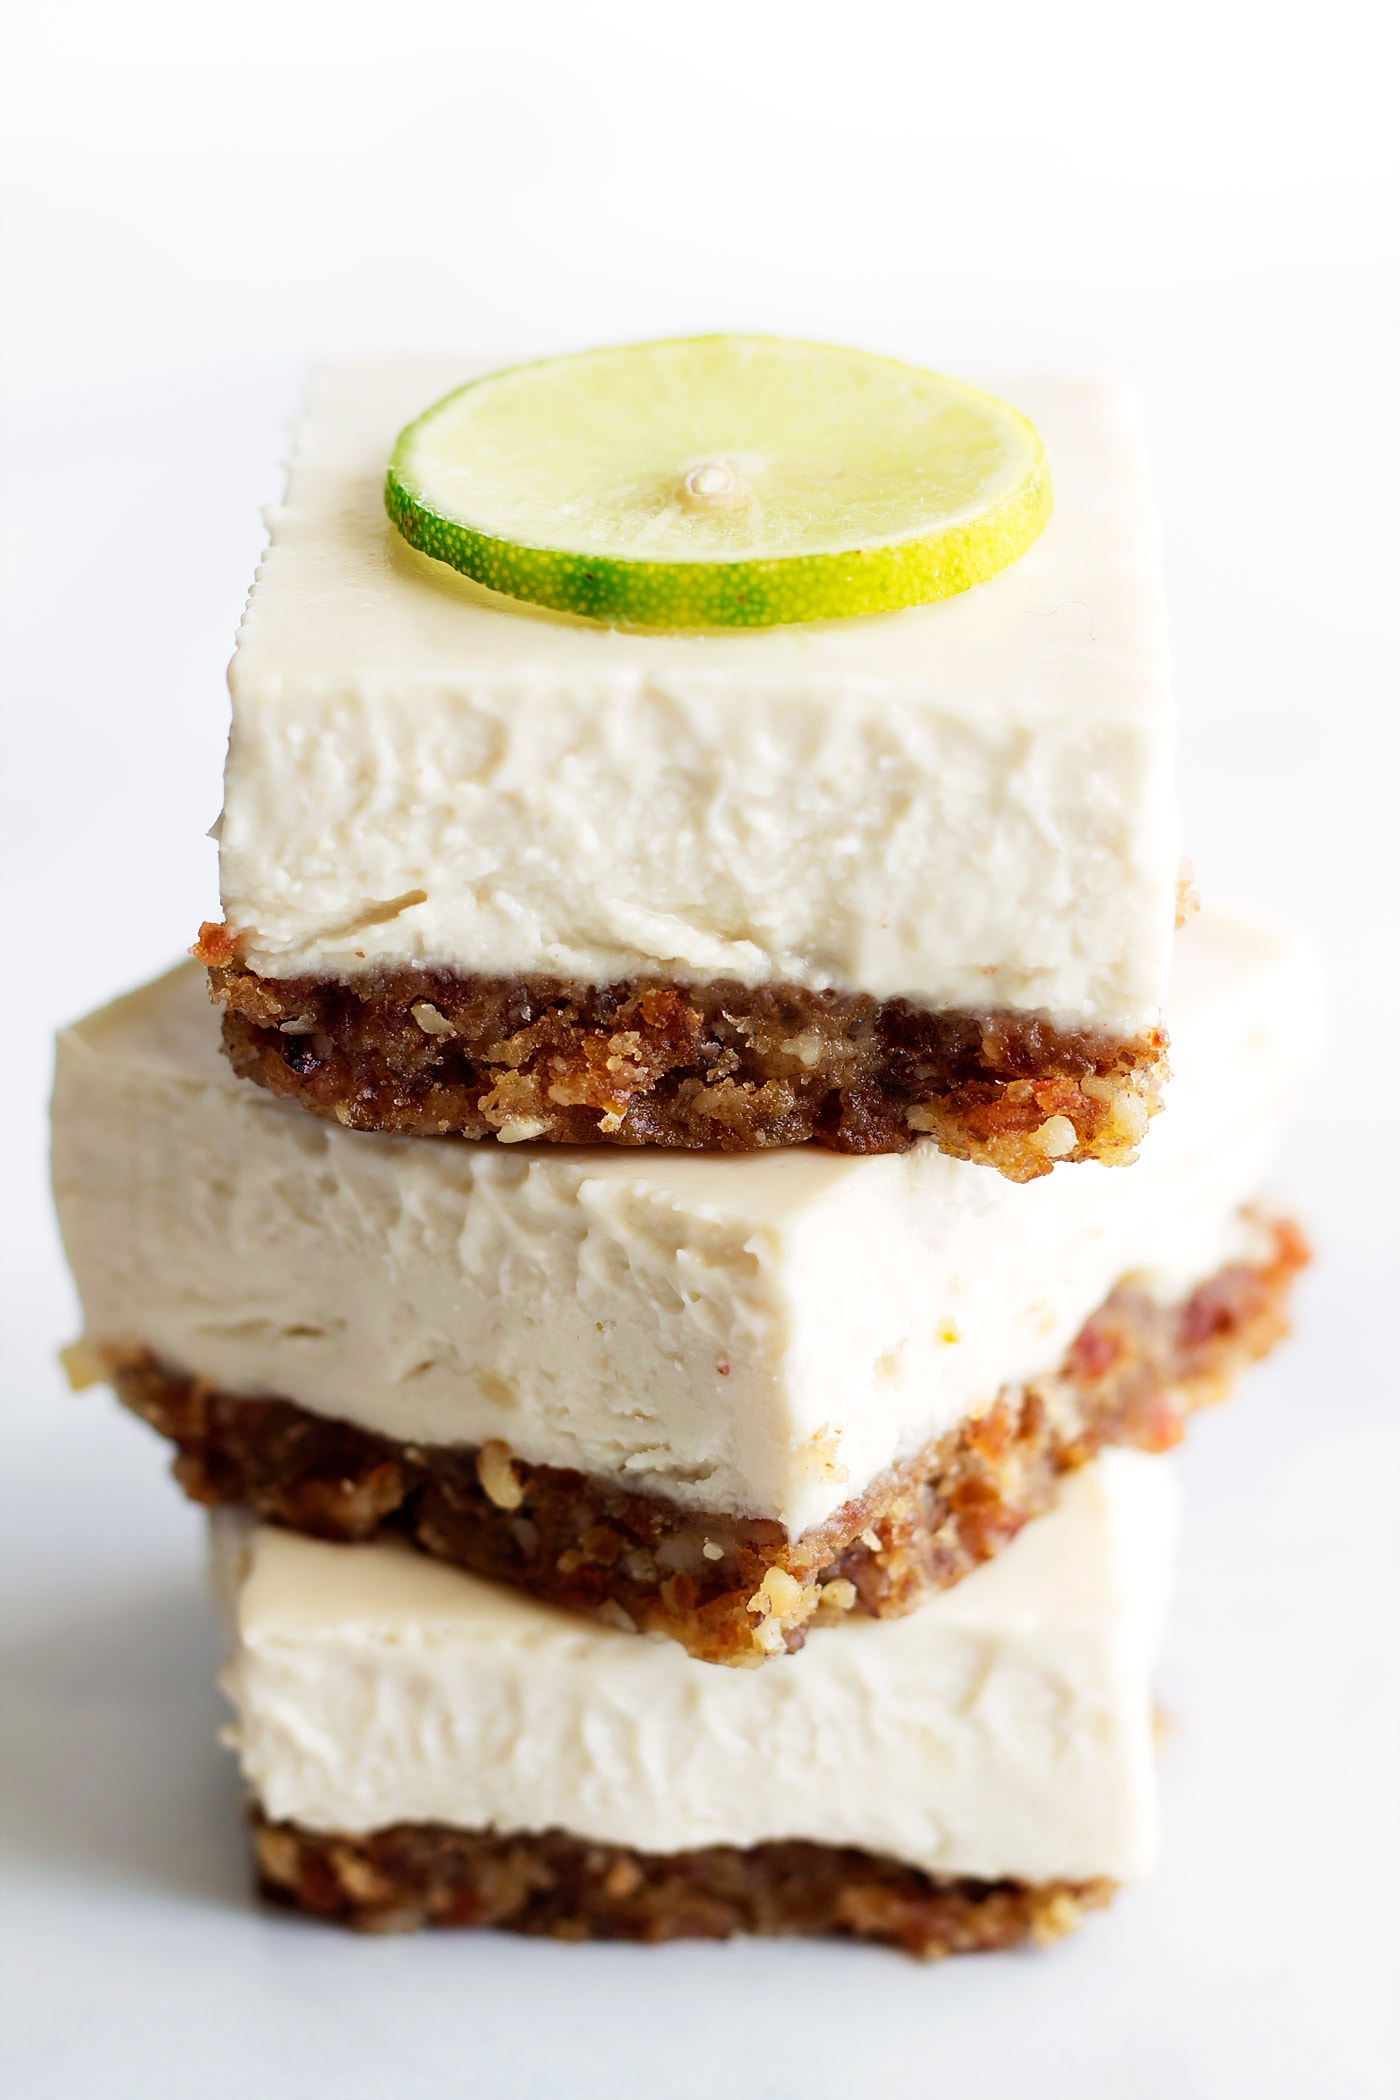
Okay anything key lime is pretty much my favorite, but also cheesecake. Delicious, delicious cheesecake. Combine the two and you’ve got pure magic. That’s what these little babies are. Pure, blissful magic.
These key lime cheesecake bars are dairy-free, gluten-free, paleo, vegan, and don’t require any baking at all! So for those of you who never make your own desserts because you aren’t much of a baker, this recipe is definitely for you. All you do is stick them in the freezer for a few hours to set! Couldn’t be easier, really.
These delicious little bars are the perfect dessert for this spring/summer season. Perfect for a special weekend treat for your family or to bring to your next party! They are a hit with everyone, even those dairy-loving, gluten-eating heathens. Kidding, kidding, I eat dairy and gluten sometimes too 😄
I’ve sweetened this dessert with just dates and maple syrup, so they aren’t quite as unhealthy as traditional sugar-sweetened cheesecakes. That being said, these are still a treat and shouldn’t be an every day kind of thing. Although, they are pretty addicting, so I wouldn’t blame you if you wanted to eat them every day! I sure do!
Okay, let’s get cooking! I hope you enjoy this recipe as much as my family does!
Equipment Needed:
- Large capacity food processor (I LOVE my Cuisinart!)
- Spatula
- 8×8″ brownie pan
- Parchment paper
- Large mixing bowl
- Whisk (I have this white and rose gold set and they are SO pretty!)
- Sharp Chef’s Knife
- Cutting Board
- Citrus reamer or juicer
- Measuring cups and spoons
- Food scale (optional, but recommended! I almost always cook by weight 🙂. It’s more accurate, time-saving, AND less clean up! I have this one in turquoise 😍)
- Freezer
Join My Community!
Want to get my new recipes delivered straight to your inbox?
Sign up for my weekly newsletter and never miss a new recipe!
No-Bake Key Lime Cheesecake Bars
- Gluten-Free
- Dairy-Free
- Paleo
- Vegetarian or Vegan
- Pescatarian
Ingredients
CRUST
- 1 1/2 cups 225g pitted Medjool dates
- 1 1/2 cups 150g walnut halves/pieces
- 1 Tbsp 14g coconut oil
- 1/8 tsp sea salt
FILLING
- 1 cup 236mL coconut milk
- 3/4 cup 195g raw cashew butter*
- 1/3 cup 79mL freshly squeezed key lime juice (juice of about 10 key limes)
- 1/4 cup 56g coconut oil, melted
- 1/4 cup 59mL or 80g pure grade A maple syrup (substitute with Pyure Organic Sugar Free Honey Alternative for lower carb)
- 1 tsp vanilla extract
- 1 pinch sea salt
GARNISH
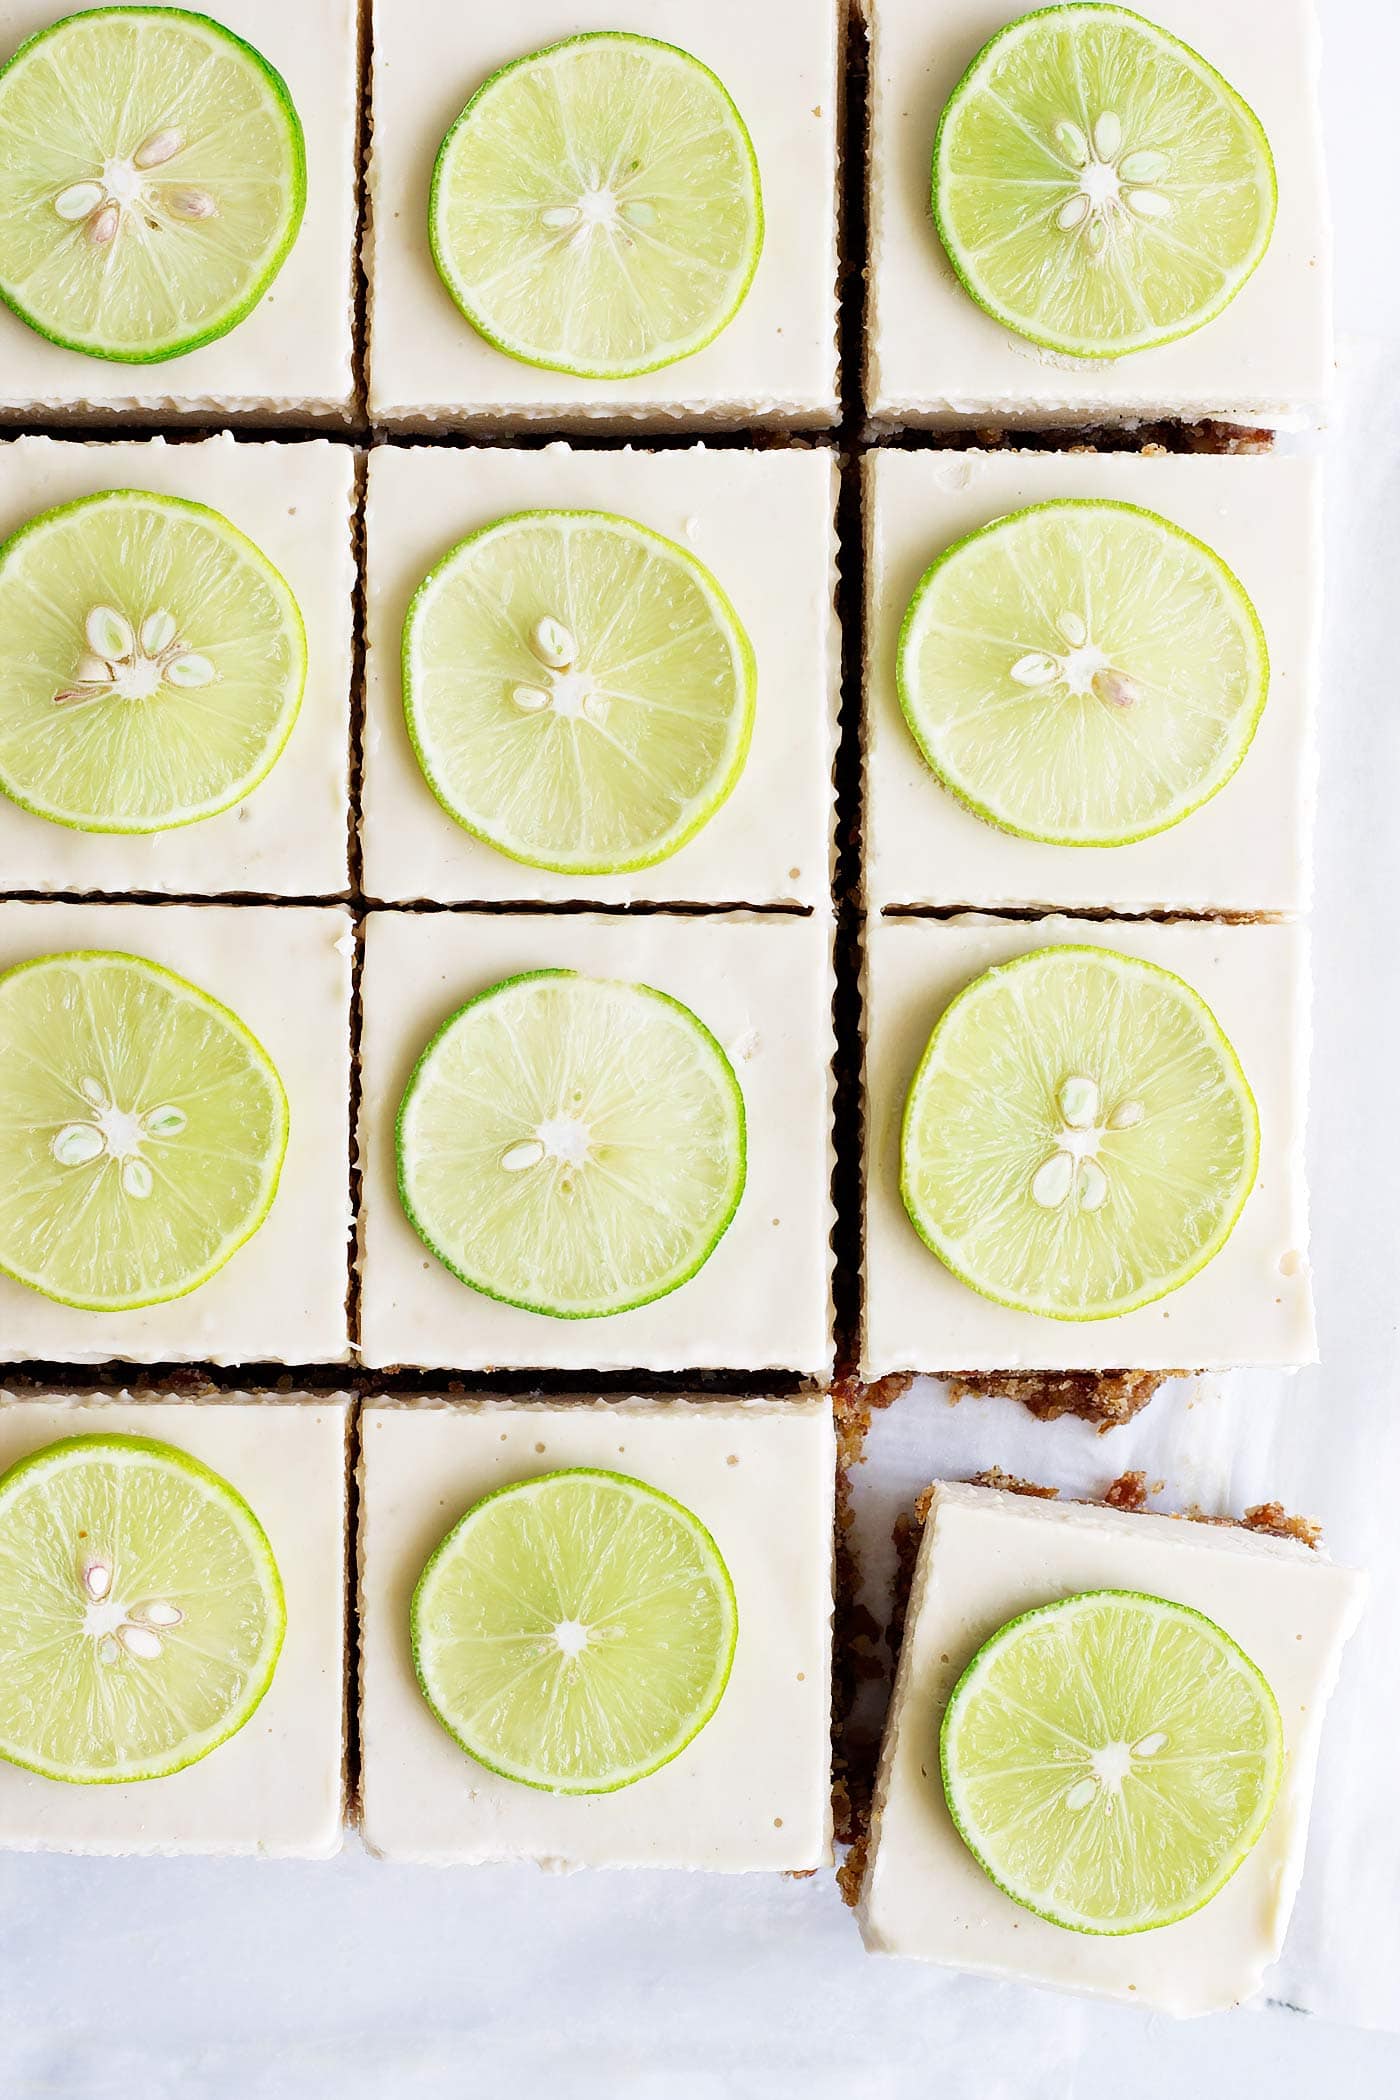
- 4 key limes sliced into 16 thin slices
Instructions
CRUST
- Before you begin to make the crust, line an 8x8" brownie pan with parchment paper. Cut 2 long sheets to line the pan with overhanging sides.
- To make the crust, place all of the crust ingredients in a food processor and pulse for about a minute or until the mixture is well combined and broken down a bit. Don’t over blend. The crust should still have a little texture to it. The mixture should stick together when pressed, but won’t form one big sticky ball in the food processor (like you may want in other recipes). If the mixture seems a little dry, add a few more dates. If it’s too sticky, add some more walnuts.
- Pour the crust mixture in the brownie pan and gently distribute it into an even layer. After you have a nice even layer, press the crust down firmly with your hands or a measuring cup to make a compact layer.
FILLING
- To make the filling, combine all ingredients in a large bowl and whisk together. Make sure all of the components of the filling are at room temperature before combining. If any of the ingredients are cold it will cause the coconut oil to clump up. If you get any clumps you can gently heat the entire mixture over super low heat over a double boiler until the clumps dissolve.
- Pour the filling over the crust and place in the freezer for about 4 hours or until the filling is completely set.
- GARNISH
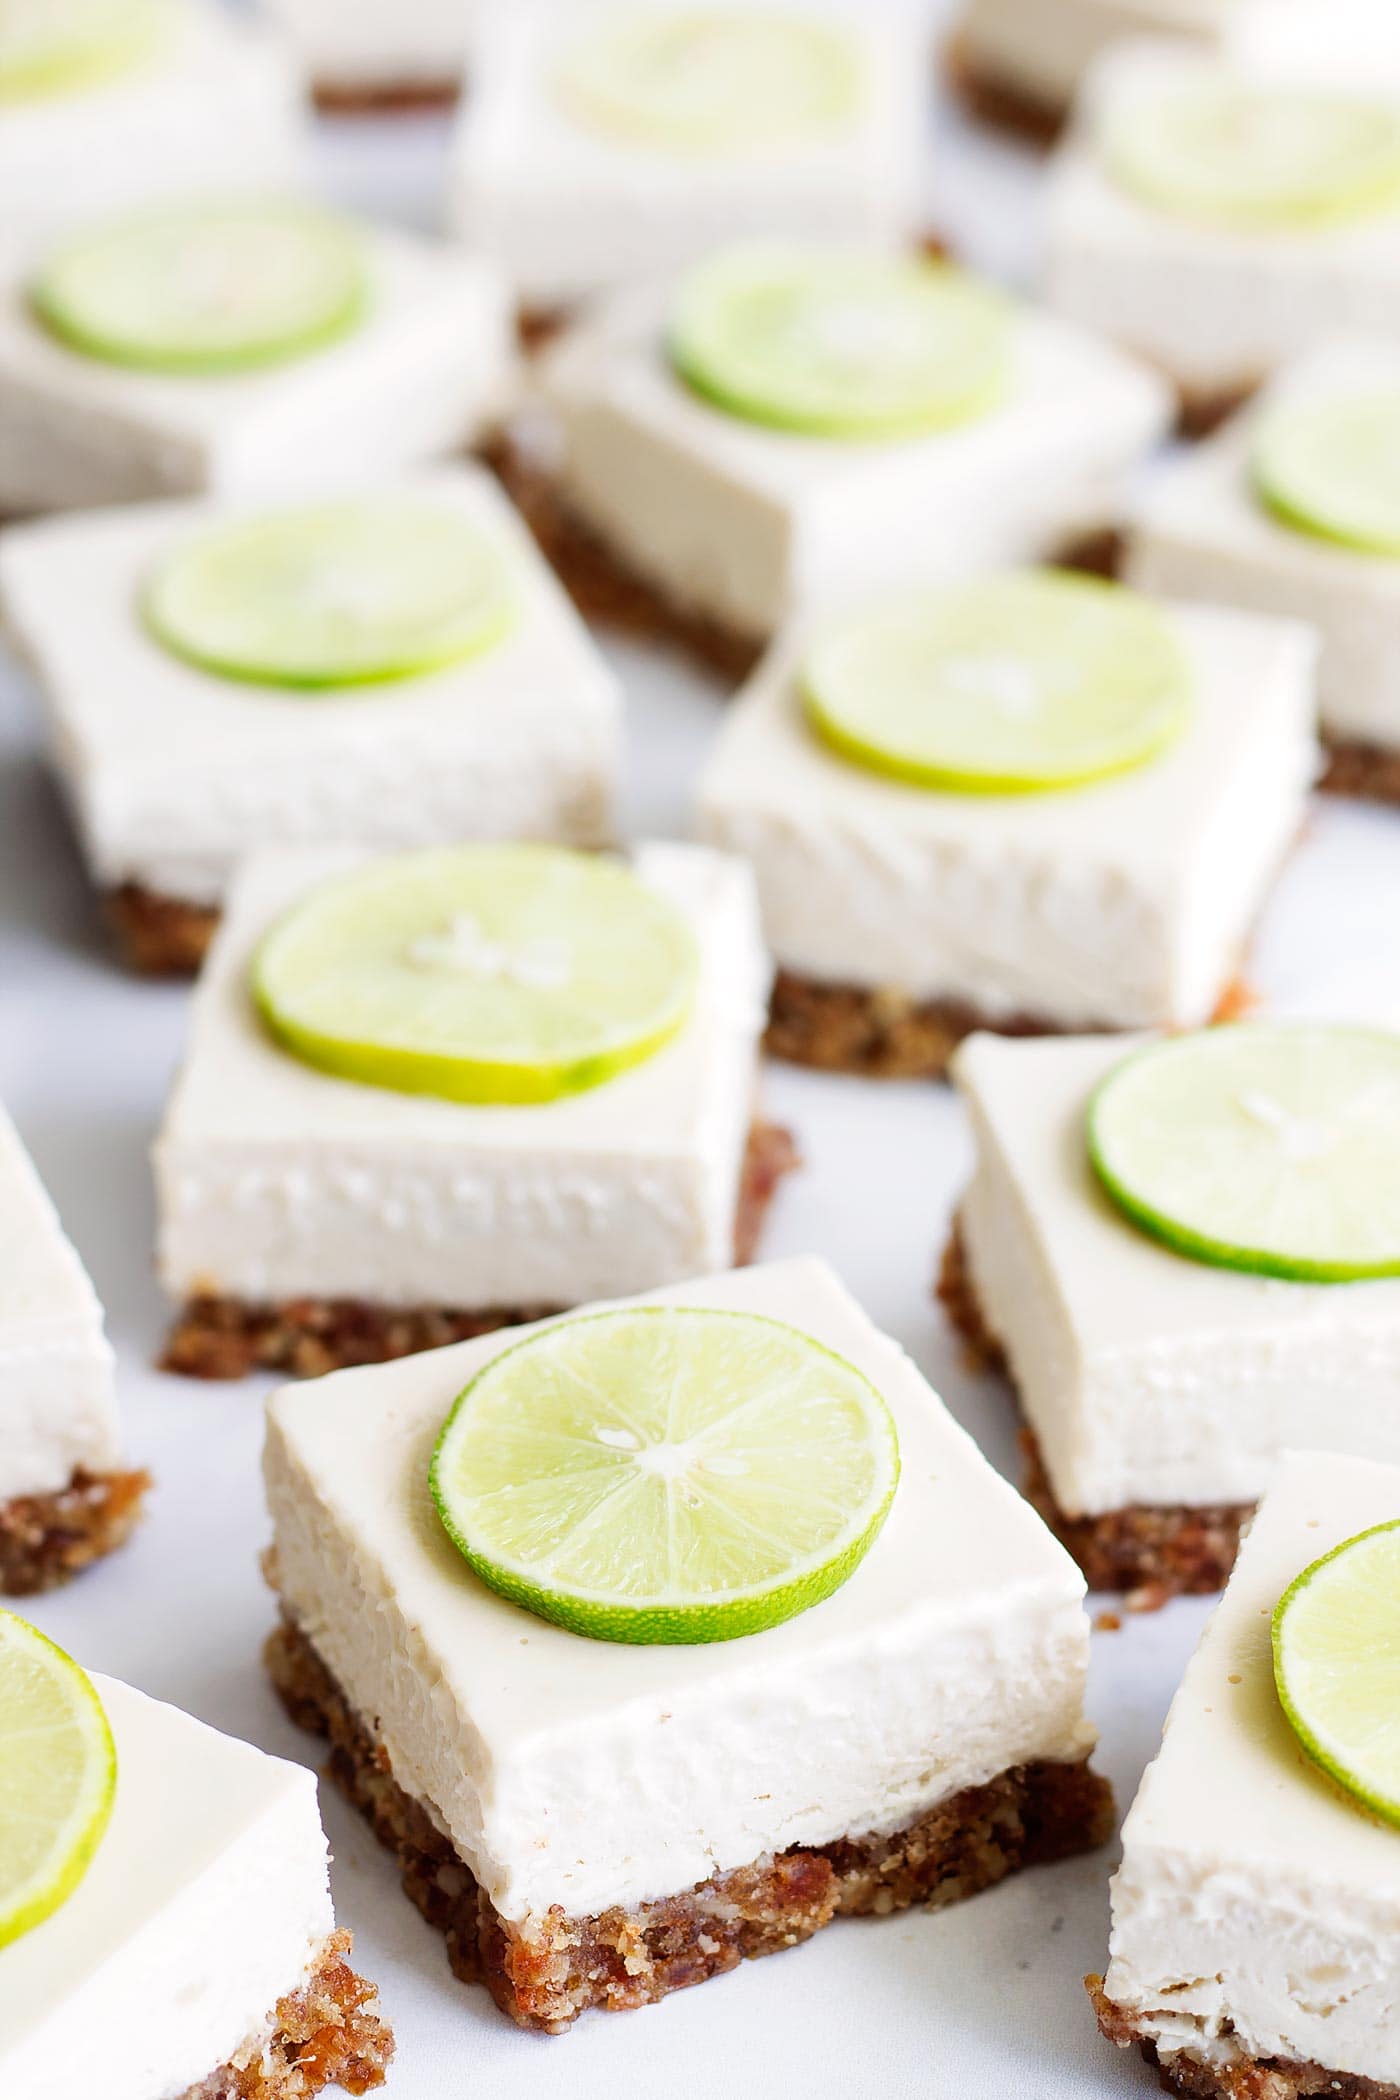
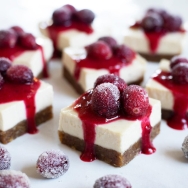
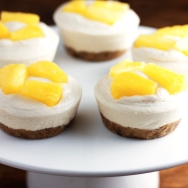
- While it's still frozen, remove from the pan by gently pulling on the overhanging parchment and place on a cutting board. Place 16 lime slices on the top where you will be cutting the bars so that each bar has one slice on it (see picture above)
- Wait about 5 minutes and then slice into 16 bars using a sharp knife. Wipe knife between cuts to make bars come out with clean edges.
- Allow to sit at room temperature for about 20-30 minutes before serving to allow them to soften a bit. Store under refrigeration in a sealed container for up to 5 days. They can also be stored in the freezer in a sealed container for even longer! If you store them in the freezer they will need to sit out for about an hour to get to the right consistency before serving. Unless you want them to be more like ice cream bars and then you would probably like it right out of the freezer! 🙂
Did you love the recipe? I would love it if you left me a 5-star review below! ![]()
Notes
Did you make this recipe?
Tag @itskitskitchen on Instagram and hashtag it #kitskitchen
Disclosure: This post contains affiliate links (Amazon Associate). These links do not cost you anything, but I do receive a commission when you use them. They are a great way to support blogs you love and pick up some good things while doing it!

These no-bake Key-Lime Cheesecake bars were just delicious! So easy to make. It’s hard to find good dairy-free and gluten-free desserts and these are just perfect!! They taste delicious straight out of the refrigerator, but we also put a few in the freezer and oh my…yummy!
Hi Lynette! I’m so glad you enjoyed the recipe! Thanks so much for the stellar review! I really appreciate it! I hope you find some more of my recipes to try 🙂
Can anything replace coconut oil and coconut milk since I am not a fan of either.
Hi Susanne! Hmm I’m not sure as I haven’t tried any substitutions in this recipe before. I can say that the end result doesn’t taste like coconut at all. The coconut oil helps it solidify when refrigerated. You could try using butter or ghee instead, but I can’t guarantee it will work. Sorry I can’t be of more help!
Can the Cashew be swapped for anything else? We have a cashew allergy.
Hi, Emily! Hmm I’m not sure. But if I were to try, I’d probably try it with macadamia nuts since they have a similar fat/protein/carb profile to cashews 🙂
If you try it with macadamia nuts I would love to hear how it turns out in case others can’t have cashews! Thanks!